There are a lot of different applications for 2D objects. Most obviously, they will allow you to set up a maker which shoppers can personalize. However, it might also be useful you have a premade logo or texture and want to apply it to a data source, you will need to load an image file. ShapeJS has simple functions for loading .png, .jpeg, .gif, and .bmp files. In this tutorial we will learn how to import 2D images of the user's choice and create 3D objects out of them.
1. 2D to 3D
ShapeJS has built in tools to make importing 2D images and converting them to 3D very simple. Image3D is a built in function for loading image files and making them into stand alone data sources.
var uiParams = [
  {
    name: "img",
    desc: "Image Source",
    type: "uri",
    onChange: "imgChanged"
  }
];

var vs = 0.1 * MM;
var imgBox;
var shape;

function imgChanged(args) {
  if (args.img === undefined)
    return null;

  imgBox = new Image3D(args.img, 20*MM, 20*MM, 4*MM, vs);
  imgBox.setBlurWidth(0.1*MM); // Similar to setBlend, but only effects this shape.
  imgBox.setImagePlace(Image3D.IMAGE_PLACE_BOTH); // Places image on both sides
  imgBox.setBaseThickness(0.5); // This means that half the image3d is a solid base
  imgBox.set("distanceFactor", 0.8);
  shape.setSource(imgBox);
  return null;
}

function main(args) {
  var s = 11*MM;
  var src = new Box(2*s, 2*s, 4*MM);
  var bounds = new Bounds(-s, s, -s, s, -s, s);
  shape = new Scene(src, new Bounds(-s, s, -s, s, -s, s), vs);

  if (args.img === undefined)
    return shape;

  imgChanged(args);
  return shape;
}
When you first run this code you will just get a box. Don't worry, that is just a placeholder and should go away as soon as you load an image. There are quite a few parameters we can set on this. In this example we have taken a look at many of them, but check the documentation for more. For example, here we did not mess with useGrayscale, which we could set to false to have the image automatically converted to black and white.
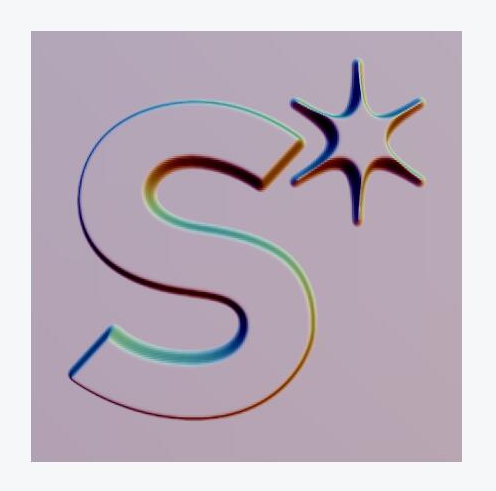
We start out then with a plane with an image popping out both sides. However, that by itself would be rather boring. Let's try a similar function, ImageMap to create a pattern we can use for that bowl we made.
2. Tiling and Embossing
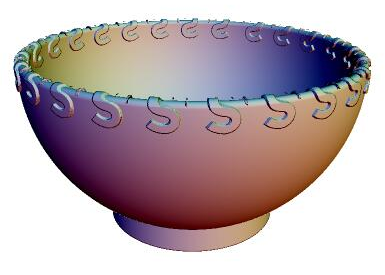
One useful application of this is the addition of patterning. We have already learned to use RingWrap, so let's apply that to an image in order to make a patterned rim for our bowl. this also gives us a chance to look at getting parameters, specifically, in this tutorial, we get the aspect ratio by finding the image's width and heighth.
You will notice that we are using ImageMap, rather than Image3D. Whereas Image3D can give us a standalone shape, ImageMap brings in the image as planar height information (with black being minimum height and white being maximum) in order to apply that information to a different data source.
var uiParams = [
  {
      name: "thickness",
      desc : "Thickness",
      type : "double",
      rangeMin: 3,
      rangeMax: 8,
      step: 0.5,
      defaultVal: 4

  },
  {
      name: "pattern",
      desc: "Pattern",
      type: "uri"
  },
  {
      name: "maxValue",
      desc: "Pattern Height",
      type: "double",
      rangeMin: 0,
      rangeMax: 3,
      step: 0.1,
      defaultVal: 1
  },
  {
      name: "tileCount",
      desc: "Tile Count",
      type: "double",
      rangeMin: 0.1,
      rangeMax: 6,
      step: 0.1,
      defaultVal: 3
  }
];

function patternChanged(args) {
  if (args.pattern === undefined) {
    return null;
  }

  var radius=80*MM;
  var tilesCount = args.tileCount;
  var tileWidth = 80*MM / tilesCount;
  var image = loadImage(args.pattern);
  var bx = tileWidth;
  var by = bx * image.getWidth()/image.getHeight();
  var bz = radius;

  //load image
  patternMap = new ImageMap(image, bx, by, bz);
  patternMap.setBlackDisplacement(args.maxValue);
  patternMap.setWhiteDisplacement(0);

  // tile and wrap image
  var ct = new CompositeTransform();
  var pwx = new PeriodicWrap(new Vector3d(tileWidth,0,0));
  pwx.setOrigin(new Vector3d(-tileWidth/2,0,0));
  ct.add(pwx);
  ct.add(new RingWrap(radius));
  ct.add(new Translation());

  patternMap.setTransform(ct);

  //pass finished engine back to main
  return patternMap;
}

function main (args) {
  var radius = 80*MM;
  var thickness = args.thickness*MM;

  //Create basic shape
  var sphere_out = new Sphere(radius);
  var sphere_in = new Sphere(radius-thickness);
  var torus_rim = new Torus(radius-thickness/2, thickness/2);
  torus_rim.setTransform(new Rotation(new Vector3d(1,0,0), Math.PI/2));
  //Create base
  var c1 = new Cylinder(new Vector3d(0,0,0), new Vector3d(0,-radius,0),radius/2);
  var c2 = new Cylinder(new Vector3d(0,0,0), new Vector3d(0,-1,0),radius/2-thickness);

  var pedastal = new Subtraction(c1,c2);
  pedastal.setBlend(0.5*MM);

  var on_ped = new Union(pedastal, sphere_out);
  on_ped.setBlend(0.5*MM);

  //Hollow the bowl
  var removed = new Subtraction(on_ped, sphere_in);
  var topped = new Subtraction(removed, new Plane(new Vector3d(0,-1,0),0));
  var rounded = new Union(topped, torus_rim);

  //Add pattern
  var embossing = patternChanged(args);

  if (embossing === null){
    var embossed = rounded;}
  else{
    var embossed = new Embossing(rounded, patternMap);
    embossed.set("minValue", 0);
    embossed.set("maxValue", args.maxValue*MM);
    embossed.set("factor", 1);
    embossed.setBlend(0.5*MM);
  }

  var remove_cyl = new Cylinder(new Vector3d(0,-radius,0), new Vector3d(0,-1,0),1);

  //Smooth underside
  var smoothed = new Subtraction(embossed, remove_cyl);
  smoothed.set("blend", 0.5*MM);

  //Display
  var s = 101*MM;
  return new Scene(smoothed,new Bounds(-s, s, -s, s, -s, s));
}
If we wanted to have it tile in Y as well, we could simply use three more line of code to set up the PeriodicWrap that direction. Try putting the following right after the first PeriodicWrap, in the patternChanged function.
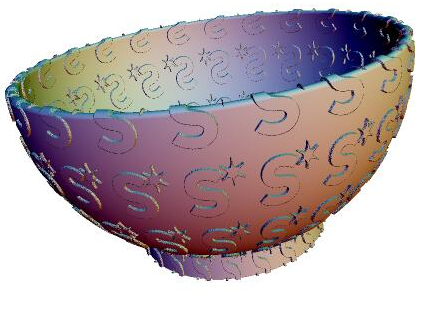
  var pwy = new PeriodicWrap(new Vector3d(0,by,0));
  pwy.setOrigin(new Vector3d(0,-by/2,0));
  ct.add(pwy);