If you encounter a shape that would be too difficult to model in ShapeJS, or one that you simply have completed in another format, you may want to move between ShapeJS and another modeling program and import or export 3D files to and from other modeling software. ShapeJS currently supports the import and export of STL and X3D. Information on how to export those files from your modeling software of choice can be found https://www.shapeways.com/tutorials/3d-software and https://www.shapeways.com/tutorials/supported-applications.
In this Tutorial we will learn how to import and export mesh geometry in one of those formats to and from ShapeJS.
1. Importing a Mesh
To import a mesh is fairly simple.
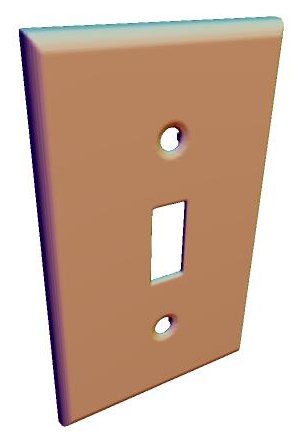
You can download the model Light Switch Plate we are using or use one of your own, just realize that a different model may require different settings.
We can also set up a UI Parameter with which to pick out the model to be imported.
If you are importing something that is not based on voxels, then you need to tell ShapeJS how to convert it to voxels, from its mesh geometry. With voxelSize you can tell shapeJS what sort of voxel density it needs to use with the mesh. Since we end up calling voxelSize a couple of times, the following example will use a variable called "vs" whenever it's needed.
You can use this code for importing just about any model, as it is set up to allow you to choose the model. If you want to have a specific model and let shoppers customize it, you can check out the Customizable Model option. What we're doing here is bringing the model in to be modified.
var uiParams = [
  {
    name: "model",
    label: "Model",
    desc: "Model to import",
    type: "uri",
    onChange: "modelChanged"
  }
];

var depthMax = 2;

function modelChanged(args) {
  var modelPath = args.model;

  if (modelPath === undefined) return;

  distData = loadModelDistance(modelPath, 2.5*MM, depthMax*MM);
  var bounds = distData.getBounds();
  shape.setBounds(bounds);
  shape.setSource(distData);
}

function makeDefaultScene() {
  var shape;
  var dr = 5 * MM;
  var src = new Box(dr, dr, dr);
  var bounds = new Bounds(-dr, dr, -dr, dr, -dr, dr);

  shape = new Scene(src, bounds);
  return shape;
}

function main(args) {
  shape = makeDefaultScene();
  modelChanged(args);
  return shape;
}
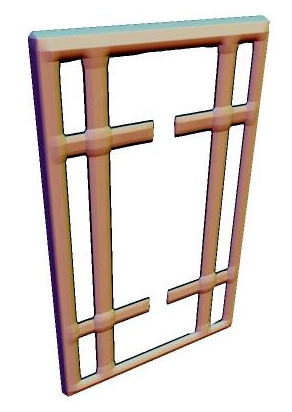
Okay, so far so good, but our Light Switch is looks like it is missing the front plate, probably because the plate is too thin at this resolution. Let's go ahead and increase the voxel resolution by taking "vs" down to 0.5 mm.
That looks about right. If we took the voxel size down too much ShapeJS would slow, and perhaps even crash, not to mention that the extra detail would not be particularly noticeable.
2. Exporting a Mesh
But what about the other way around? What if you have a model in ShapeJS and want to create an actual model file, either to upload or to modify further in a 3D modeling program? Saving a model is even easier than loading one. Simply hit the "Save Model" button.
function main(args) {
  var radius = 10 * MM;

  var cube = new Box(2*radius,2*radius,2*radius);
  var pattern = new VolumePatterns.Lidinoid();
  pattern.set("period", radius);
  pattern.set("thickness", 0.5*MM);
  pattern.set("level", -1);

  var intersect = new Intersection();
  intersect.set("blend",0.1*MM);
  intersect.add(cube);
  intersect.add(pattern);

  var r = radius+1*MM;
  return new Scene(intersect,new Bounds(-r,r,-r,r,-r,r));
}
But wait, what if we want to make some adjustments to that model when we save it? say we have something like this:
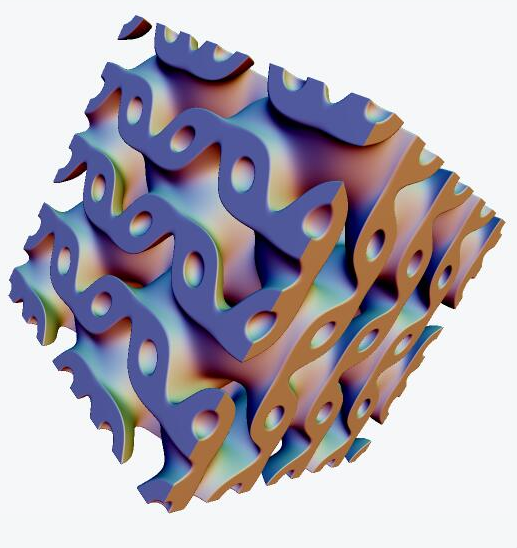
We've played around with the voxel size, but how are we going to deal with the fact that there's a disconnected part? We could, of course, with some useful Scene methods.
(Note: At this time, changing the meshErrorFactor, meshMaxPartsCount, and meshMinPartVolume are not reflected in the render. Only the exported mesh has the changes.)
meshErrorFactor - This is maximal error allowed during mesh decimation (reducing mesh complexity). It is given relative to voxel size. Default value is 0.5. You"ll want to set it lower for models that have smaller, more detailed parts, but be careful, as this can add significant amounts of geometry.
function main(args) {
  var radius = 10 * MM;

  var cube = new Box(2*radius,2*radius,2*radius);
  var pattern = new VolumePatterns.Lidinoid();
  pattern.set("period", radius);
  pattern.set("thickness", 0.5*MM);
  pattern.set("level", -1);

  var intersect = new Intersection();
  intersect.set("blend",0.1*MM);
  intersect.add(cube);
  intersect.add(pattern);

  var r = radius+1*MM;
  var scene = Scene(intersect,new Bounds(-r,r,-r,r,-r,r));
  scene.setMeshErrorFactor(0.5);  // value is relative to the voxel size

  return scene;
}
Export this scene. Then try changing the meshErrorFactor to 1.0, exporting again, and comparing it to the previouse one. Note the difference in polygon count (higher meshErrorFactor means less polygons).
meshMinPartVolume - If you happened to end up with any disconnected parts of your model, you will want to use the following. Using meshMinPartVolume will allow you to filter out any parts with a smaller volume than this is set to. The default value is one cubic millimeter.
function main(args) {
  var radius = 10 * MM;

  var cube = new Box(2*radius,2*radius,2*radius);
  var pattern = new VolumePatterns.Lidinoid();
  pattern.set("period", radius);
  pattern.set("thickness", 0.5*MM);
  pattern.set("level", -1);

  var intersect = new Intersection();
  intersect.set("blend",0.1*MM);
  intersect.add(cube);
  intersect.add(pattern);

  var r = radius+1*MM;
  var scene = Scene(intersect,new Bounds(-r,r,-r,r,-r,r));
  scene.setMinShellVolume(0.000005);  // value is in meters cubed

  return scene;
}
The argument to setMinShellVolume() is expected to be in cubic meters, so be carful that a slight change could mean removing the intended shell, no shells, or even all shells.
meshMaxPartsCount - This specifies the maximum number of parts to save. Whatever number you put in, it will save that number, starting with the largest. By default all parts are retained. For a number of materials the number of parts you can print as a single job is limited, so you will want to pay extra attention to this.
function main(args) {
  var radius = 10 * MM;

  var cube = new Box(2*radius,2*radius,2*radius);
  var pattern = new VolumePatterns.Lidinoid();
  pattern.set("period", radius);
  pattern.set("thickness", 0.5*MM);
  pattern.set("level", -1);

  var intersect = new Intersection();
  intersect.set("blend",0.1*MM);
  intersect.add(cube);
  intersect.add(pattern);

  var r = radius+1*MM;
  var scene = Scene(intersect,new Bounds(-r,r,-r,r,-r,r));
  scene.setMaxPartsCount(1);

  return scene;
}
These parameters all have default settings that you may not need to change at all. However, if your model is exported not looking the way that you want, you will likely need to use these.
By using these variables carefully, we can make sure that we do not have to clean up the mesh in another program and, if we wish to work with it in that program, it will be as we intended it to be.
Beautiful. Congratulations, you've gotten through the last tutorial. Unless you consider the debugging Tutorial to be one of them. In that case, disregard prior congratulations.